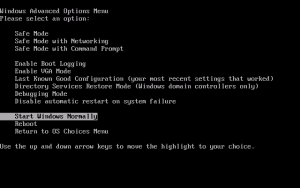
 Sometimes you may need to access in advanced boot menu of your windows PC. But in windows 8, 8.1 and windows 10, advanced boot menu is disabled by default. That means pressing F8 or Shift+F8 may not work. As a result, you can’t turn on your PC in safe mode. You have to enable legacy advanced boot menu in windows 8/8.1 and windows 10 manually. This is not so long and complex process. You can do it by following a few steps.
Enable Legacy Advanced Boot Menu in Windows 8/8.1/10:
To enable legacy advanced boot menu in windows, you have to follow a few steps given below-
- At first you need your windows installation DVD or pendrive. Insert it in your PC.
- Now restart your PC.
- Now press F12 or F10 (Depends on your PC) to open boot menu.
- Select boot from CD/DVD or USB Storage drive and press enter.
- Now you may see an dialogue ‘Press any key to continue’. Then press any button from your keyboard.
- Now you will see windows setup box. Click on Next.
- Then click on Repair your computer.
- Now choose an option and click on troubleshoot.
- Then click on advanced option.
- In advanced option, click on command prompt.
- In command prompt, type c: and press enter from your keyboard.
- Now type BCDEDIT /SET {DEFAULT} BOOTMENUPOLICY LEGACY and press enter to enable legacy advanced boot
Show/Hide
- After completing the process of enabling legacy advanced boot menu, type EXIT in command prompt and press enter.
- Now back to Choose an option screen and click on Continue. Your PC will be restarted.
- Eject your windows installation DVD or disconnect your Pendrive.
- Done.
I am the target text.
Now you have enabled legacy advanced boot menu in windows 8 or windows 10. But you should verify if it has really worked.

0 comments:
Post a Comment